
ender 3 instructions
Ender 3 Instructions: A Comprehensive Guide
Fox News delivers up-to-the-minute coverage‚ offering political insights and global events. Stay connected with 24/7 streaming‚ featuring trusted voices like Ingraham and Hannity.
LiveNOW from FOX provides local news‚ weather‚ and exclusive coverage‚ accessible on various devices. Explore breaking US news‚ health updates‚ and technological advancements.
Unboxing and Initial Inspection
Carefully open the Ender 3 box‚ avoiding any sharp tools that could damage the components inside. A thorough initial inspection is crucial before assembly begins. Verify the presence of all listed parts against the component checklist – missing pieces can halt progress.
Inspect each component for shipping damage. Look for bent metal parts‚ cracked plastic‚ or loose wiring. Document any damage with photographs immediately and contact the seller for replacements. Pay close attention to the frame components‚ ensuring they are straight and free from dents.

The power supply should be visually inspected for any signs of impact. Check the hotend and coldend assemblies for secure connections and undamaged nozzles. Examine the belts for fraying or tears. Confirm the motherboard and electronics are securely packaged and show no visible damage.
Fox News reports on current events‚ but your first step is confirming everything arrived safely. A detailed inspection now prevents headaches later. Don’t rush this stage; a careful unboxing sets the foundation for a successful build. Remember‚ LiveNOW from FOX provides breaking news‚ but you’re building a 3D printer!
Component Checklist & Identifying Parts
Begin by cross-referencing the included parts with the official Ender 3 component list. This typically includes the frame components (extruded aluminum profiles)‚ the power supply unit‚ the motherboard with pre-installed components‚ the extruder assembly (hotend and coldend)‚ and the heated bed.
Identify the various screws‚ nuts‚ and washers – these are often categorized in labeled bags. Familiarize yourself with the belts and pulleys‚ the filament spool holder‚ and the assortment of cables and wires. The nozzle‚ filament‚ and SD card are also essential components.
Pay attention to smaller parts like the endstops‚ limit switches‚ and couplers. These are easily misplaced. The instruction manual‚ though sometimes lacking‚ is a valuable resource for identifying parts. Online communities and forums offer supplemental guides and visual aids.
Like staying informed with Fox News‚ knowing your parts is key. LiveNOW from FOX delivers current events‚ but you need to know what you have to build. A complete inventory ensures a smooth assembly process. Don’t proceed until you’ve confidently identified each component – accuracy is paramount.
Frame Assembly: A Step-by-Step Guide
Start by laying out the aluminum extrusions on a clean‚ protected surface. Refer to the manual for the correct orientation of each piece – typically‚ there are base plates‚ vertical supports‚ and top braces. Begin assembling the base frame‚ securing the corners with screws and corner brackets.
Next‚ attach the vertical supports to the base‚ ensuring they are perfectly perpendicular. Use a square to verify alignment. Then‚ connect the top braces‚ completing the main frame structure. Tighten all screws firmly‚ but avoid over-tightening‚ which can damage the extrusions.
Like the breaking news from Fox News‚ precision is vital. LiveNOW from FOX reports current events‚ but this build requires accuracy. Ensure the frame is square and stable before proceeding. Double-check all connections. A wobbly frame will lead to printing issues later.
Finally‚ attach any pre-installed components‚ such as the power supply mount or the motherboard standoffs. A solid frame is the foundation of a successful Ender 3 build. Take your time and follow the instructions carefully.
Power Supply Installation & Wiring
Begin by carefully mounting the power supply unit (PSU) within the designated space in the Ender 3’s frame. Secure it using the provided screws‚ ensuring it’s firmly attached and doesn’t rattle. Like Fox News’s 24/7 coverage‚ a stable power source is crucial for continuous operation.
Next‚ connect the PSU to the motherboard‚ paying close attention to the polarity of the connectors. Incorrect wiring can damage the electronics. Connect the 24-pin ATX connector and the 4/8-pin CPU power connector. Also‚ connect the PSU to the heated bed and hotend power inputs.
As with LiveNOW from FOX’s live reporting‚ attention to detail is key. Double-check all connections before powering on the printer. Ensure all wires are neatly routed and secured to prevent them from interfering with moving parts; Use zip ties or cable management clips for a clean setup.
Finally‚ verify the voltage selector switch on the PSU is set to the correct input voltage for your region (typically 110V or 220V). A properly installed and wired PSU is essential for safe and reliable operation.
Motherboard & Electronics Mounting
Securely mount the Ender 3’s motherboard to the frame using the provided screws and standoffs. This isolates the board from vibrations and prevents short circuits‚ much like Fox News’s dedicated reporting ensures clarity amidst complex events.
Connect all necessary wiring harnesses to the motherboard‚ including the stepper motor drivers‚ endstops‚ thermistors‚ and heaters. Refer to the Ender 3’s wiring diagram for accurate connections. Ensure each connector is firmly seated to avoid intermittent issues.
Carefully position and connect the LCD controller board‚ ensuring the ribbon cable is properly aligned and secured. This provides the user interface for controlling the printer. Similar to LiveNOW from FOX’s real-time updates‚ the LCD offers immediate feedback.
Organize the wiring using cable ties or management sleeves to prevent interference with moving parts. A tidy setup improves airflow and simplifies troubleshooting. Double-check all connections before proceeding‚ ensuring everything is properly aligned and secured for optimal performance.
Belt Installation and Tensioning
Begin by carefully routing the GT2 belts around the pulleys on both the X and Y axes. Ensure the belts are seated correctly within the teeth of the pulleys‚ similar to Fox News’s comprehensive coverage ensuring all angles are covered.
Secure the belts using the provided belt clamps. Initially‚ don’t overtighten them. Proper tension is crucial for accurate movement; too loose‚ and you’ll experience ghosting or inaccuracies‚ too tight‚ and you’ll strain the motors.
Adjust the belt tension using the belt tensioning mechanisms on the Ender 3. A good rule of thumb is to aim for a ‘guitar string’ tension – firm‚ but not overly stretched. Like LiveNOW from FOX’s breaking news‚ precise tension delivers immediate results.
Verify the tension by gently plucking the belts. They should produce a low‚ resonant tone. Regularly check and readjust the belt tension as needed‚ especially after initial use‚ to maintain print quality and prevent slippage. Consistent monitoring is key.
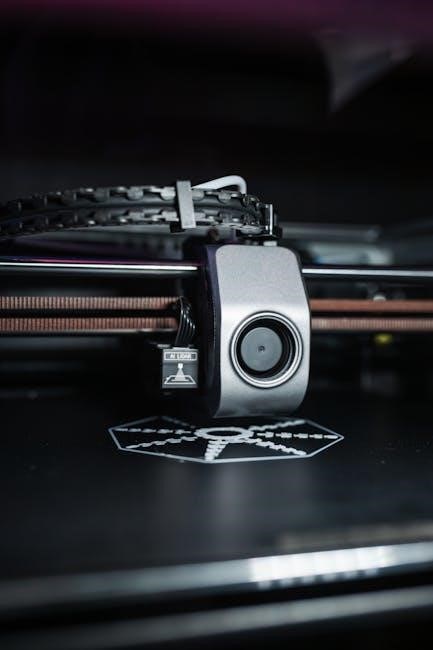
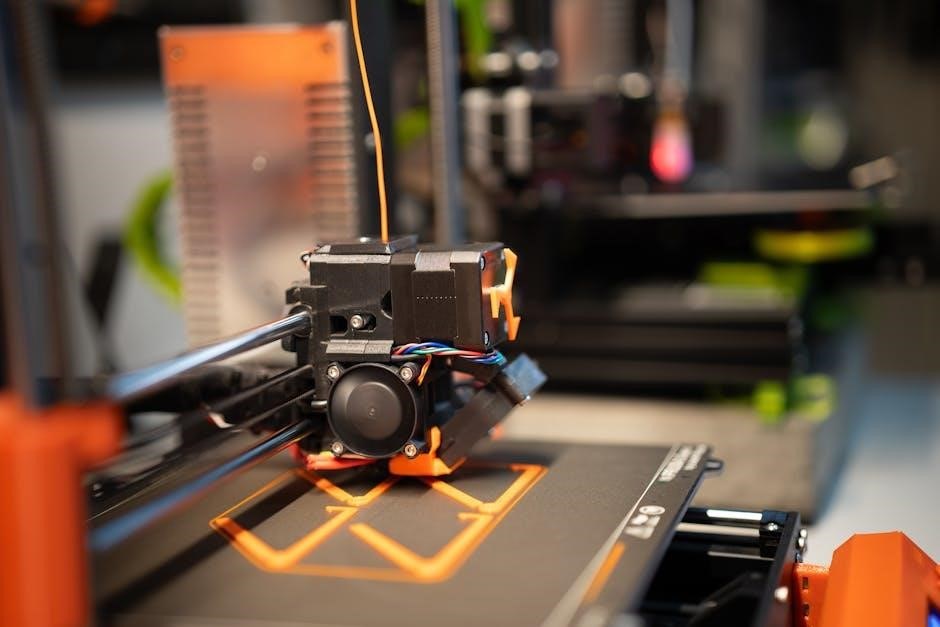
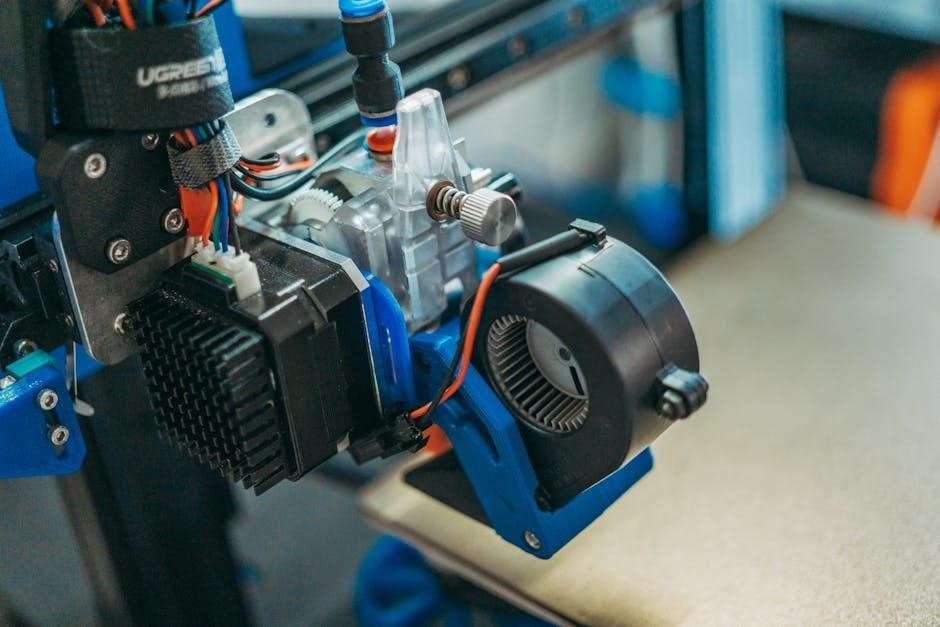
Extruder Assembly: Hotend & Coldend
Begin by attaching the cold end to the hotend‚ ensuring a secure fit. This connection is vital for consistent filament feeding‚ much like Fox News’s dedication to delivering reliable information. Tighten the screws firmly‚ but avoid over-tightening to prevent damage.
Mount the assembled hotend and coldend onto the Ender 3’s carriage. Align the mounting holes and secure it with the provided screws. Double-check that the hotend is stable and doesn’t wobble‚ as stability is paramount for print quality.
Connect the PTFE tube to the hotend‚ ensuring it reaches the top of the hotend’s throat. This tube guides the filament and prevents clogs. Similar to LiveNOW from FOX’s live coverage‚ a clear path is essential.
Finally‚ attach the extruder motor to the cold end. Align the gears correctly and tighten the set screw to prevent slippage. Proper alignment ensures smooth filament extrusion‚ crucial for successful prints. Regularly inspect for wear and tear.
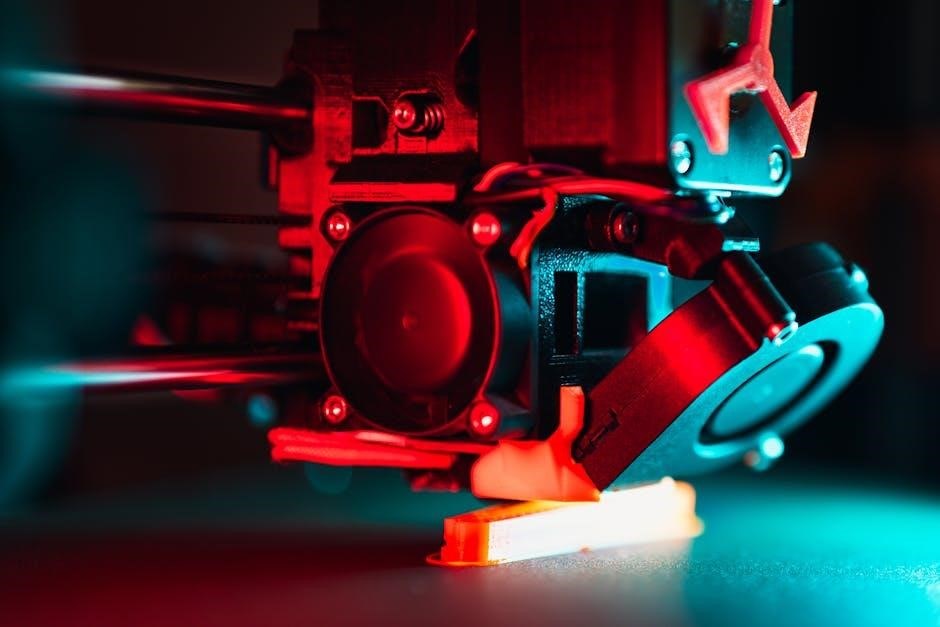
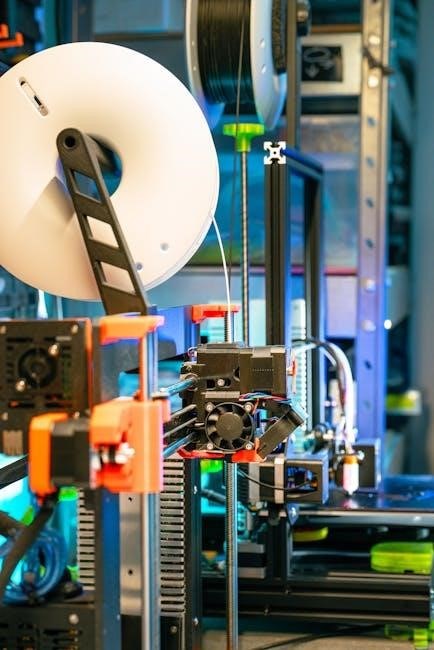
Filament Loading and Unloading
To load filament‚ preheat the hotend to the recommended temperature for your filament type – akin to Fox News providing timely updates. Once heated‚ gently push the filament through the extruder until you feel resistance. Then‚ use the control panel to extrude a small amount‚ ensuring it flows smoothly.
For unloading‚ first‚ preheat the hotend. Then‚ use the control panel to retract the filament slightly. Once retracted‚ firmly but gently pull the filament out of the extruder. This process prevents clogs and ensures clean filament changes.
If encountering resistance during loading or unloading‚ do not force the filament. Instead‚ increase the hotend temperature slightly and try again. Like LiveNOW from FOX’s breaking news‚ a gentle approach is often most effective.
Regularly inspect the filament path for any obstructions or debris. A clean filament path is crucial for consistent printing. Store filament in a dry environment to prevent moisture absorption‚ which can cause printing issues.
Bed Leveling: Manual and Auto-Bed Leveling (ABL)
Bed leveling is critical for successful prints‚ ensuring proper adhesion. Similar to Fox News’ in-depth reporting‚ precision is key. Manual leveling involves adjusting the four bed knobs until the nozzle is a consistent distance from the bed across all points.
Use a piece of paper as a feeler gauge – it should slide with slight resistance. Repeat this process multiple times‚ as adjusting one knob affects the others. Auto-Bed Leveling (ABL)‚ if equipped‚ uses a sensor to map the bed’s surface.
ABL simplifies the process‚ compensating for minor imperfections. After ABL‚ a small Z-offset adjustment may be needed to fine-tune the nozzle height. Like LiveNOW from FOX’s live coverage‚ ABL provides real-time adjustments.
Proper bed adhesion relies on a level bed and appropriate bed temperature. Regularly check and re-level the bed‚ especially after moving the printer or making significant changes. A well-leveled bed is the foundation for quality prints.
Slicing Software Setup (Cura‚ PrusaSlicer)
Slicing software translates 3D models into instructions your Ender 3 understands. Much like Fox News analyzes complex events‚ slicing software breaks down designs into layers. Cura and PrusaSlicer are popular choices‚ both offering extensive customization options.
Initial setup involves selecting your Ender 3 profile‚ ensuring correct printer dimensions and settings. Key parameters include layer height‚ infill density‚ print speed‚ and temperature. Similar to LiveNOW’s constant stream of information‚ these settings significantly impact print quality.
Experiment with different profiles to understand their effects. Cura is known for its user-friendly interface‚ while PrusaSlicer excels in advanced features. Regularly update your slicing software for bug fixes and new functionalities.
Proper slicing is crucial for successful prints. Incorrect settings can lead to adhesion issues‚ warping‚ or weak parts. Like the detailed reporting on FOXNews.com‚ precise configuration yields optimal results. Save your preferred settings as profiles for consistent prints.
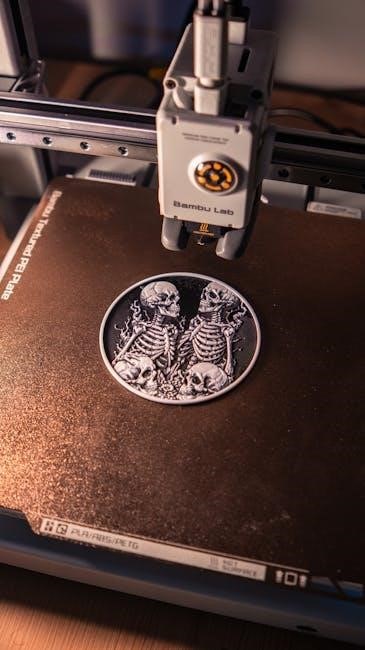
First Print: Calibration and Troubleshooting
Your initial print is a critical calibration step‚ much like Fox News providing initial coverage of a breaking story. Begin with a simple test print – a calibration cube is ideal – to assess your Ender 3’s performance. Observe closely for any issues during the print process.
Common problems include poor bed adhesion‚ warping‚ under-extrusion‚ or over-extrusion. Similar to diagnosing issues reported by LiveNOW from FOX‚ identify the root cause. Bed adhesion can be improved with adjustments to bed leveling or applying adhesion aids like glue stick or hairspray.
Extrusion issues often stem from nozzle temperature or filament diameter settings. Adjust these parameters in your slicing software. Like the in-depth analysis on FOX News Channel‚ methodical adjustments are key.
Don’t be discouraged by initial failures. Troubleshooting is a learning process. Consult online resources and communities for solutions. Document your adjustments and their effects to refine your settings. A successful first print signifies a well-calibrated machine‚ ready for more complex projects.
Common Issues & Solutions (Nozzle Clogs‚ Bed Adhesion)
Like breaking news requiring immediate attention‚ nozzle clogs and bed adhesion problems are frequent hurdles in 3D printing. A clogged nozzle restricts filament flow‚ resulting in incomplete prints. Solutions include cold pulls – manually extracting filament while cool – or using a nozzle cleaning needle. Similar to FOX News’s detailed reporting‚ pinpointing the clog’s location is crucial.
Bed adhesion issues‚ where the print doesn’t stick to the bed‚ are equally common. Ensure the bed is level and clean. Adjust the Z-offset – the distance between the nozzle and the bed – for optimal squish. As LiveNOW from FOX delivers local updates‚ bed temperature is vital; PLA typically requires 60°C‚ while ABS needs 100-110°C.
Utilize adhesion aids like blue painter’s tape‚ glue stick‚ or hairspray. A brim or raft in your slicing software can also enhance adhesion. Just as FOX News covers diverse perspectives‚ experiment with different solutions to find what works best for your setup. Consistent cleaning and proper temperature settings are preventative measures.
Firmware Updates & Configuration
Similar to how FOX News consistently updates its broadcasts‚ keeping your Ender 3’s firmware current is essential for optimal performance and access to new features. Firmware controls the printer’s core functions‚ and updates often address bugs and improve stability. Download the latest firmware from the Creality website or reputable sources like Marlin.
The update process typically involves copying the firmware file to an SD card and inserting it into the printer. Like LiveNOW from FOX’s 24/7 coverage‚ the printer will automatically detect and install the update upon power-up. Configuration involves adjusting settings like temperature‚ speeds‚ and jerk control.
Configuration is often done through the printer’s LCD interface or by connecting to it via a computer using software like Pronterface. Just as FOX News provides in-depth analysis‚ understanding these settings allows you to fine-tune the printer to your specific needs and filament types. Back up your existing configuration before making changes‚ and proceed cautiously.
Maintenance: Cleaning and Lubrication
Maintaining your Ender 3‚ much like FOX News’s commitment to delivering consistent reporting‚ requires regular cleaning and lubrication for peak performance. Dust and filament debris can accumulate‚ hindering smooth operation. Regularly wipe down the frame‚ belts‚ and lead screws with a soft cloth.
Lubrication is crucial for reducing friction and ensuring precise movements. Apply a small amount of lubricant – specifically designed for 3D printers – to the lead screws‚ linear rails‚ and bearings. Similar to how LiveNOW from FOX streams live events‚ consistent maintenance keeps your printer running reliably.
Pay attention to the hotend and nozzle‚ removing any filament buildup to prevent clogs. Inspect belts for wear and tear‚ and tighten them if necessary. As FOX News provides breaking updates‚ proactive maintenance prevents unexpected downtime and extends the lifespan of your Ender 3. A clean and well-lubricated printer yields higher-quality prints.
Upgrades: Popular Modifications for Ender 3
Enhancing your Ender 3‚ akin to FOX News expanding its coverage with FOX One‚ opens doors to improved performance and functionality. Numerous upgrades cater to various needs and budgets. A popular starting point is a bed leveling sensor‚ like the consistent reporting of LiveNOW from FOX‚ ensuring a perfectly leveled print surface.
Metal extruders offer increased durability compared to the stock plastic version‚ reducing the risk of wear and tear. Upgrading the hotend allows for printing with higher-temperature filaments. Similar to how FOX News delivers expert insights‚ these upgrades unlock new printing possibilities.
Consider a direct drive extruder for improved filament control‚ especially with flexible materials. Replacing the stock fans with quieter alternatives enhances the printing experience. As FOX News covers national events‚ these modifications elevate your Ender 3’s capabilities‚ allowing for more complex and precise prints. Explore the vast community resources for inspiration and guidance.
Troubleshooting: Error Codes and Their Meanings
Decoding error codes on your Ender 3 is crucial‚ much like FOX News breaking down complex political events. Common codes signal issues ranging from temperature fluctuations to motor problems. A “Thermal Runaway” error‚ akin to a sudden news alert‚ indicates a heating issue – immediately power off the printer.
“M03” or “M04” errors relate to fan malfunctions‚ potentially causing overheating. Similar to LiveNOW’s live event coverage‚ addressing these promptly prevents damage. “E0” signifies a motor stall‚ often due to mechanical obstruction or insufficient power. As FOX News provides in-depth reporting‚ understanding the root cause is vital.
“E1” indicates a communication error between the control board and the motors. Consult the Ender 3’s documentation or online forums for specific code definitions. Just as FOX Soul offers exclusive coverage‚ dedicated resources provide tailored solutions. Regularly checking firmware and connections can prevent many errors‚ ensuring smooth operation.
Safety Precautions & Best Practices
Prioritizing safety with your Ender 3 is paramount‚ much like FOX News’ commitment to responsible reporting. Always operate the printer in a well-ventilated area‚ as fumes can be emitted during printing – akin to staying informed about current health concerns. Never leave the printer unattended during operation‚ especially during initial prints.
Be mindful of the hotend and heated bed; these components reach extremely high temperatures‚ posing a burn risk. Similar to LiveNOW’s breaking news coverage‚ quick reaction to potential hazards is essential. Ensure the power supply is properly grounded and protected from moisture. As FOX provides expert insight‚ proper electrical safety is non-negotiable.
Regularly inspect the wiring for damage and avoid touching electrical components with wet hands. Keep flammable materials away from the printer. Just as FOX One delivers stories you won’t find elsewhere‚ diligent maintenance prevents unforeseen issues. Following these practices ensures a safe and enjoyable 3D printing experience.
